Home
/ How To Install Board And Batten Wall - If your sheathing is not solid, you will need to first attach horizontal furring strips.
How To Install Board And Batten Wall - If your sheathing is not solid, you will need to first attach horizontal furring strips.
How To Install Board And Batten Wall - If your sheathing is not solid, you will need to first attach horizontal furring strips.. Mark the point on both pieces and cut accordingly. I really wanted to ensure that the board and batten took up most of the wall. Place a nail every 10 inches or so on the top and bottom of the board to ensure it is fixed to the wall properly while the glue has time to dry. I used my stud finder and a laser level to mark the wall and studs all the way down the stairs and along the wall. Board and batten is an easy and affordable way to create a custom look in your home.
Start by determining how high you want your board and batten. Get real diy tips, and get inspired to create a project like this for yourself! But we did it in a shaker style. Use construction adhesive to glue the pieces to the walls. They make the perfect weekend project and instantly add style to a plain wall.
How To Install Board And Batten As An Accent Wall Grace In My Space from graceinmyspace.com If your sheathing is not solid, you will need to first attach horizontal furring strips. Attach the horizontal pieces, the top and the baseboard to the studs using 2 nails and and a nail gun. Measure the exact height of the vertical pieces on the two ends on the wall and attach using 2 nails and a nail gun. Diy bri shows you how to successfully complete a board and batten wall yourse. Line up your two pieces until their edges touch; They make the perfect weekend project and instantly add style to a plain wall. This will make up for the thickness of the board and batten wall. I figure the space between the two end pieces of trim on each side of the wall.
I then measured and cut the 1x4x8 boards to size (mitering the ends) and nailed them into studs with my nail gun.
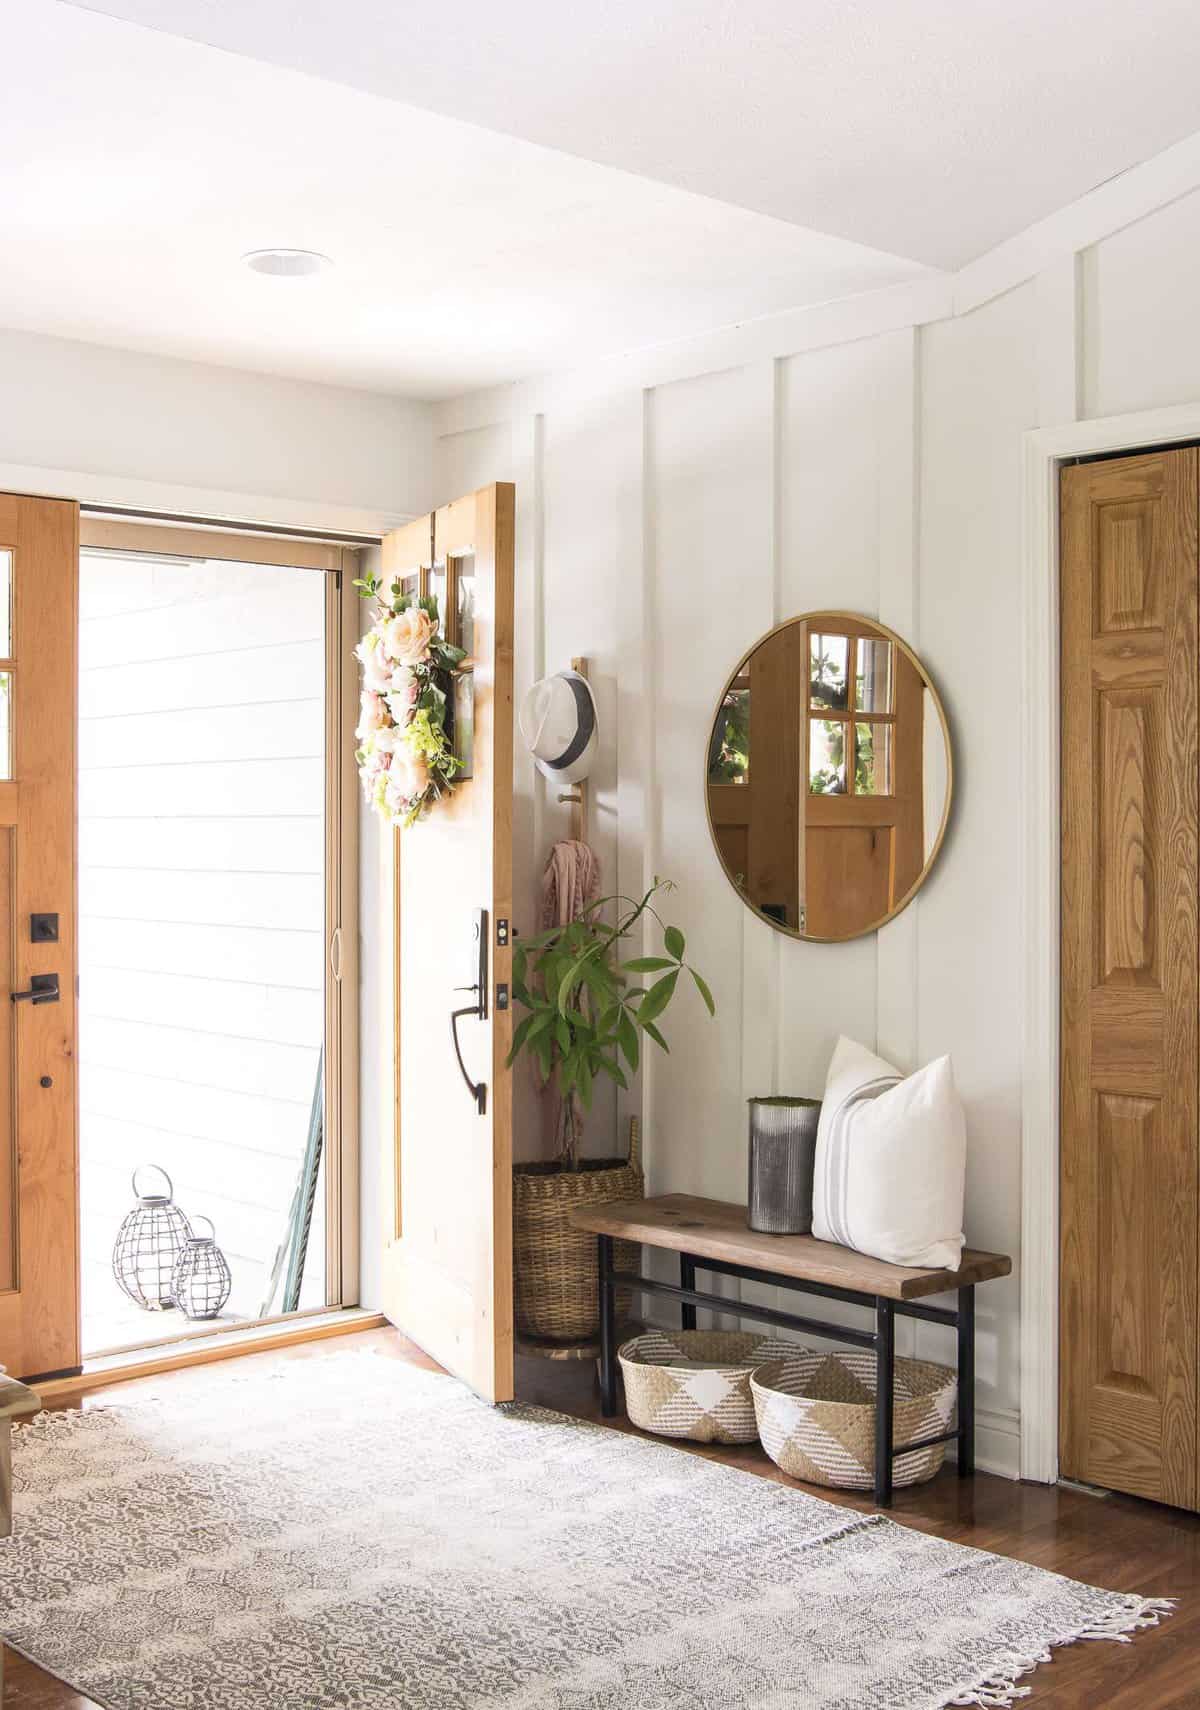
I did this project for my entryway refresh but it can easily be adapted to any room in your home. Board and batten walls are a super simple and easy upgrade to a room. The first thing you want to address is your baseboards. So from the top of the baseboard to the top of my upper chair rail, it was 35 1/2 inches (39 1/2 inches from the floor). There are so many configurations possible! Next, install the vertical boards, ledge, and molding. The first step is to install the batten pieces that will go on either side of the wall and along the top of the wall. Get real diy tips, and get inspired to create a project like this for yourself! If it is too thin, you may have to install a thicker piece of. Be sure to check that you are level as you go. Though i don't have a complete before prior to the first part of the board and batten installation, you can see what a difference in the first part of the wood installation has made. Werkzeug und baumaterial für profis und heimwerker. Install bottom board rip a 3/4″ thick piece of wood or mdf down to the same width as your baseboard.
Repeat the steps with the vertical trim batten boards. Place your trim on the saw and move the saw angle till it matches up. Nail the batten in place. Werkzeug und baumaterial für profis und heimwerker. Attach boards to the wall while holding the horizontal board in place, use a nail gun to attach it to the wall.
100 Board And Batten Entryway With Hooks House Mix from www.housemixblog.com Using the ceiling piece as a spacer, push the wall piece up to the ceiling piece (you will need a helper to do this, which is why we didn't get any pictures) and nail in place. Learn how to easily install a diy board and batten wall in any room! Learn how to install a simple diy board and batten wall and add tons of character to any room! I started with the bottom piece along the stairs, and then copied the same measurements on another piece for the top. Start with the whole wall framing trim pieces on the very top, then bottom, then left and right. Measure and cut your crown molding pieces. Diy bri shows you how to successfully complete a board and batten wall yourse. We chose to have our board and batten, 16 inches apart.
Standard baseboards are usually thinner than the boards you'll want to use as battens.
Start with the whole wall framing trim pieces on the very top, then bottom, then left and right. Repeat the steps with the vertical trim batten boards. For a uniform look, remove the baseboard and install a new base, using a board the same thickness as your. It will get you an exact match! We made a 14.5 inch board, for a spacer board, to go in between each board and batten. Install corner & top boards. The first step is to install the batten pieces that will go on either side of the wall and along the top of the wall. Again, apply more construction adhesive to the back of the batten pieces and press on to the wall. Attach boards to the wall while holding the horizontal board in place, use a nail gun to attach it to the wall. Get real diy tips, and get inspired to create a project like this for yourself! Mark the point on both pieces and cut accordingly. So, i used 1/4″ sanded plywood. Standard baseboards are usually thinner than the boards you'll want to use as battens.
Board and batten step 2: Mark the point on both pieces and cut accordingly. Wallpaper, shiplap, wainscoting, board & batten, or paint…we're all about the accent walls, and whatever you choose to do they are sure to make a statement. The first thing you want to address is your baseboards. Place your trim on the saw and move the saw angle till it matches up.
Everything You Need To Know About Diy Board And Batten Walls Small Stuff Counts from smallstuffcounts.com I really wanted to ensure that the board and batten took up most of the wall. It will get you an exact match! The first thing you want to address is your baseboards. Measure and cut your crown molding pieces. I started with the bottom piece along the stairs, and then copied the same measurements on another piece for the top. Okay, now lets get that board and batten wall treatment installed. Place a nail every 10 inches or so on the top and bottom of the board to ensure it is fixed to the wall properly while the glue has time to dry. Plus they look good in all colors and styles.
If your sheathing is not solid, you will need to first attach horizontal furring strips.
Here is a full tutorial for how to install board and batten as an accent wall! The next step is placing the vertical boards on the wall. (our battens were spaced 12 apart) make sure that your batten is level. Now you are ready to install the battens. Steps to add diy board and batten to walls i started with the chair rail first. They make the perfect weekend project and instantly add style to a plain wall. Learn how to install a simple diy board and batten wall and add tons of character to any room! Get real diy tips, and get inspired to create a project like this for yourself! Next, install the vertical boards, ledge, and molding. Attach the horizontal pieces, the top and the baseboard to the studs using 2 nails and and a nail gun. For a uniform look, remove the baseboard and install a new base, using a board the same thickness as your. But we did it in a shaker style. So from the top of the baseboard to the top of my upper chair rail, it was 35 1/2 inches (39 1/2 inches from the floor).
I simply cut my 8 foot boards in thirds (minus a little for the saw blade width), so my boards were 31 1/2 inches, plus the 4 inches for top trim how to install board and batten. I used my stud finder and a laser level to mark the wall and studs all the way down the stairs and along the wall.

